UPDATED: Best Practices for Application Virtualization (App-V)
Get link
Facebook
X
Pinterest
Email
Other Apps
Since previous video had some technical issues, updated the blog with the new one. This webinar is from Steve Thomas explaining current best practices for App-V.
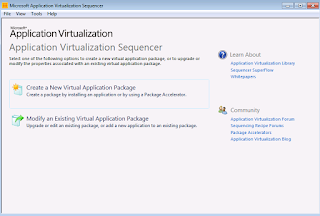
1) Launch the Microsoft Application Virtualization Sequencer from Start-> All Programs 2) Select the create package (default) option. 3) Select the "Standard application" type in the type of application to be sequenced. 4) Select "Perform a custom installation" in the select installer screen and click next. 5) Provide the virtual application name as VLC Media Player and click next. 6) Install the VLC Media player application now. Uncheck Desktop shortcut option. Uncheck Run Vlc Media Player option and click finish. 7) Once Installation is completed, Select "I am finished Installing" and click next. 8) In the configure Phase, launch the required shortcuts and perform custom changes if needed and remove unwanted shortcuts. Here we have removed all unwanted shortcuts other than the main VLC Media Player shortcut. Launched it and unch...
Microsoft has released a windows Installer MSI for Microsoft Teams for deployment through SCCM.You can download it here As per Microsoft Statement: "The Teams MSI will place an installer in Program Files. Whenever a user signs into a new Windows User Profile, the installer will be launched and a copy of Teams application will be installed in that user's appdata folder. If a user already has the Teams app installed in the appdata folder, the MSI installer will skip the process for that user." NOTE: Don't change the install location as it will break the process. In this blog, I will explain how this happens by opening MSI using Installshield. 1. To Install Microsoft Teams, it first requires .net 4.5 or later to be installed in the machine. This check happens using Launch condition which also does a system search for .net registry to be present in the machine. 2. The MSI has only one file which is Teams.exe that gets installed to [ProgramFilesFolder]Teams Installer locat...
1) Launch the Microsoft Application Virtualization Sequencer from Start->Programs 2) Select the "Standard application" type in the Type of Application to be Virtualized 3) Select "Perform a custom installation" in the select installer screen Provide the virtual application name as Google Chrome and click next. 4) Before the application is installed, make sure that the below registy entries are placed to disable the updates. [HKEY_LOCAL_MACHINE\SOFTWARE\Policies\Google\Update] "UpdateDefault=dword:00000000 "AutoUpdateCheckPeriodMinutes"=dword:0000000 5) Start the installation during monitoring phase.Install the package using source "GoogleChromeStandaloneEnterprise.msi" After installation, perform the following steps. - Delete the services : Google Update service (gupdate, gupdatem) using the below command in CMD ; SC DELETE gupdate SC DELETE gupdatem - Remove the shortcut from desktop - Remove the folder Update from Program Files (x8...


Comments
Post a Comment